How to Clean Igloo Ice Maker: Quick Steps
This post contains affiliate links. As an Amazon Associate, we earn from qualifying purchases.
That stale, metallic taste in your ice cubes? It’s your Igloo ice maker desperately signaling it needs a deep cleaning. Countertop ice makers like yours become breeding grounds for mold and mineral scale within weeks of regular use, turning refreshing drinks into potential health hazards. The good news: following this exact cleaning process every 3-6 months restores crystal-clear ice production and adds years to your machine’s lifespan. You’ll eliminate foul odors, prevent frustrating operational failures, and avoid costly repairs—all using common household items already in your pantry.
This guide delivers the precise method technicians use to revive Igloo ice makers, cutting through confusing online advice with actionable steps proven effective on models from IM153 to ICE25. Whether you’re battling cloudy ice or prepping for summer entertaining, you’ll master how to clean Igloo ice maker components safely without damaging sensitive parts. Let’s transform your machine from a bacteria factory into your kitchen’s most reliable appliance.
Spotting Critical Cleaning Triggers in Your Igloo Unit
Don’t wait for complete failure—your Igloo ice maker shows clear distress signals demanding immediate attention. Ice tasting sour or musty indicates bacterial growth in stagnant water, while cloudy or soft cubes reveal dangerous mineral buildup restricting water flow. If production slows dramatically or you notice black spots around the ice scoop tray, mold has already invaded critical components. These aren’t minor issues: contaminated ice makers can harbor Legionella bacteria within 48 hours of neglect.
Quick visual check: Use a dental mirror to inspect behind the ice-forming coils. Any slimy residue or dark discoloration means you’re overdue for cleaning. This hidden buildup directly contacts your ice during production, forcing contaminants into every cube. Ignoring these signs risks permanent damage to the pump and cooling system—address problems at the first sign of trouble.
Assemble Your Igloo Cleaning Toolkit Before Starting

Non-Scratch Cleaning Essentials
Gather these specific tools to avoid scratching plastic components: a soft sponge (never abrasive pads), lint-free microfiber cloths, and an old toothbrush modified with 90-degree bend (heat handle under hot water to create this angle). The bent toothbrush reaches behind cooling elements where scale hides, while microfiber prevents lint contamination. A kitchen sprayer ensures thorough rinsing in tight spaces without disassembly.
Food-Safe Cleaning Solutions Only
Never use harsh chemicals—stick to these proven options: white distilled vinegar (dissolves scale without fumes), 3% hydrogen peroxide (kills 99.9% of mold spores), mild dish soap (for removable parts), and lime juice (2 tbsp for odor elimination). Always use filtered water for final flushing to prevent immediate recontamination. Bleach alternatives are unnecessary and risk damaging internal seals when used improperly.
Power Down and Drain Your Igloo Ice Maker Safely
Unplug immediately and let the unit sit for 30 minutes before touching anything. This critical step prevents electrical shock and allows residual ice to melt naturally. Never force frozen components—patience avoids cracked trays and damaged motors. While waiting, remove the drain plug (located at the bottom rear) and tilt the unit over your sink to empty all standing water. Stale reservoir water contains the bacteria causing off-flavors, so drain completely even if the machine appears empty.
Warning: Skipping this power-down period risks severe injury from moving parts. The cooling fan may continue spinning for minutes after unplugging, and residual electricity can damage sensitive circuitry during cleaning.
Disassemble and Soak Critical Components

Remove These Parts First
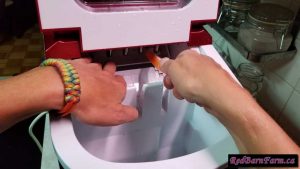
Take out the ice basket, scoop, drip tray, and bottom cover (prevents debris from entering the pump). Handle plastic components gently—these parts become brittle with age and can crack if forced. The bottom cover is especially crucial: it traps hair and food particles that accelerate mold growth when left in place during cleaning.
Vinegar Soak Technique
Submerge all removable parts in undiluted white vinegar for exactly 15 minutes. This dissolves calcium deposits without scrubbing—watch scale bubble away as vinegar penetrates microscopic cracks. Follow with a 30-minute soak in warm, soapy water to neutralize vinegar taste and eliminate surface bacteria. Never use boiling water during this process; it warps plastic components and voids warranties.
Deep Clean Interior Surfaces Systematically
Targeted Vinegar-Water Wipe Down
Mix 1 part vinegar to 10 parts warm water in a spray bottle and saturate interior surfaces. Focus on the ice-forming compartment corners where mold hides—these areas contact every cube you produce. Use microfiber cloths to wipe downward from top to bottom, preventing recontamination of cleaned zones. Pay special attention to the drain channel; clogs here cause water overflow and electrical hazards.
Precision Cleaning with Modified Toothbrush
Use your heat-bent toothbrush to scrub behind cooling coils and around the ice dumper mechanism hinges. These spots collect pink slime (biofilm) that standard wiping misses. Work slowly—aggressive scrubbing damages temperature sensors. Look for black residue near the water inlet; this indicates mold requiring hydrogen peroxide treatment in the next step.
Sanitize Internal Components with Hydrogen Peroxide
Complete Sanitization Cycle
Fill the reservoir with 3-4 cups of 3% hydrogen peroxide and run a full ice-making cycle. The machine will produce “peroxide ice”—discard all cubes immediately as they’re unsafe for consumption. This cycle sanitizes hidden components like the pump and water lines that manual cleaning can’t reach. Let residual peroxide melt in the base, then drain completely through the rear plug.
Pro tip: Save drained peroxide in a labeled spray bottle—it’s perfect for sanitizing cutting boards. Never mix peroxide with vinegar; this creates corrosive peracetic acid that damages seals.
Flush Residual Chemicals Completely
Triple-Flush Protocol
Run two consecutive ice-making cycles using only filtered water, discarding all ice after each cycle. This removes vinegar and peroxide residues that cause off-flavors. For stubborn odors, add 2 tablespoons lime juice to the final flush cycle—citric acid neutralizes alkaline residues without chemical aftertaste. Always use cool filtered water; hot water deforms plastic reservoirs and cracks seals.
Absolute Dryness Before Reassembly
Drape a clean cotton towel over the open lid for 24 hours to allow airflow while blocking dust. Never reassemble while damp—moisture trapped inside causes immediate mold regrowth. Verify dryness by touching all surfaces; condensation in hidden corners breeds bacteria within hours. Reinstall components only when the unit feels room-temperature to the touch.
Prevent Future Buildup with Weekly Habits
Daily Maintenance Non-Negotiables
Drain and replace reservoir water weekly—never top off old water. Stale water develops biofilm within 72 hours. Always use the scoop (never hands) to remove ice; skin oils accelerate contamination. After each use, wipe the ice basket with a vinegar-dampened cloth to prevent residue accumulation. These 30-second habits eliminate 80% of deep-cleaning needs.
Proper Storage for Off-Seasons
When storing your Igloo ice maker: run a full cleaning cycle first, drain completely, leave the lid ajar, and store upright in a cool, dry place. Never store with the drain plug inserted—trapped moisture causes mold within days. Place silica gel packets inside to absorb ambient humidity during storage.
Fix Post-Cleaning Problems Immediately
Cloudy ice after cleaning? Switch to distilled water immediately—your tap water contains minerals reforming scale. Run three additional flush cycles. Persistent vinegar smell? Mix 2 tbsp baking soda in warm water, run one cycle, then do two water flushes. Black spots returning fast? Your water source is contaminated; install an inline filter and extend drying time to 48 hours.
Critical Safety Violations to Avoid
Never use boiling water—it deforms the reservoir and cracks seals. Avoid bleach completely unless facing severe mold; it corrodes metal components and requires 5+ rinse cycles. Never mix cleaning agents—vinegar + peroxide creates toxic fumes. Consult your manual first; some newer Igloo models (like ICE103) have self-cleaning modes that simplify this process.
Maximize Your Igloo Ice Maker’s Lifespan
Replace water filters every 6 months—hard water areas need monthly changes. Inspect behind coils monthly using your dental mirror to catch buildup early. Run the machine daily if possible; stagnant water causes more damage than regular use. Units used weekly need cleaning only twice yearly versus monthly for occasional users.
Your Igloo ice maker deserves this simple care—it works tirelessly to keep you cool. By mastering how to clean Igloo ice maker components properly, you’ll enjoy restaurant-quality ice for years while avoiding $150+ repair bills. Start today: that first crisp, clean cube will prove it’s worth every minute.