How to Clean Black Mold from Ice Maker
This post contains affiliate links. As an Amazon Associate, we earn from qualifying purchases.
That musty smell in your ice cubes? It’s black mold thriving in your ice maker right now. This dangerous fungus colonizes within days in the dark, damp environment of your machine, turning your ice into a health hazard. Whether you own a countertop ice maker or a built-in refrigerator unit, how to clean black mold from ice maker is critical knowledge—especially since the FDA classifies ice as food, making contamination a serious violation.
Ignoring mold risks severe consequences: E. coli and salmonella survive freezing temperatures, putting immunocompromised individuals at immediate danger. One in five bars and restaurants serve unsanitary ice, and your home unit is equally vulnerable. This guide delivers exact steps to eliminate mold fast, prevent regrowth, and ensure every ice cube is safe. You’ll learn which cleaners work (and which create toxic fumes), plus pro techniques for hidden mold in water lines.
How Black Mold Takes Over Your Ice Maker in 14 Days
Your ice maker’s dark, moist interior is mold’s perfect breeding ground—especially when yeast particles from bread, beer, or dough circulate nearby. Within two weeks, colonies explode in high-risk zones:
– Against walls with zero airflow
– Near flour-dust prep stations
– Beside beer fermentation tanks
– Any spot with poor ventilation
Why vinegar beats bleach for most home units:
Commercial cleaners like affresh® work, but white distilled vinegar (1:1 water ratio) safely dissolves mold without corroding parts. Bleach (1 tbsp per gallon water) is effective but damages stainless steel—use chlorine-free versions if required. Never mix cleaners: vinegar + bleach creates deadly chlorine gas.
Critical Supplies Checklist Before You Start
Gather these exact supplies to avoid mid-cleaning trips:
– Rubber gloves and safety goggles (non-negotiable for chemical exposure)
– White vinegar or EPA-approved disinfectant (avoid lemon juice—it’s less effective)
– Soft-bristle brush and cotton swabs (for crevices around ice chutes)
– Microfiber cloths (lint-free drying)
– Funnel (for water line cleaning)
⚠️ Stop here if your unit is commercial: Restaurants and bars need professional cleaning every 6 months. FDA violations from moldy ice trigger closures—don’t risk it with DIY.
Step-by-Step Mold Removal for Home Ice Makers

Unplug and Drain Your Machine Completely
- Cut all power: Unplug countertop models. For fridge units, disable the ice maker and unplug the refrigerator.
- Empty every ice cube into the sink—do not use contaminated ice.
- Drain residual water: Locate the drain plug (usually under the ice basket) or tilt the unit to remove hidden water pockets.
- Remove all detachable parts: Ice basket, scoop, and trays need separate cleaning.
Pro Tip: Snap photos during disassembly—reassembly errors cause 30% of post-cleaning leaks.
Scrub Hidden Mold in Critical Zones
Target these mold hotspots:
– Rubber seals around the ice chute (mold hides under gaskets)
– Water reservoir corners (use cotton swabs dipped in vinegar)
– Ice ejection arms (scrub with soft brush)
– Drain holes (clogs trap stagnant water)
Deep clean method:
1. Soak removable parts in warm, soapy water for 10 minutes.
2. Pour 1:1 vinegar-water solution into the reservoir. Let sit 15 minutes—do not run cycles yet.
3. Scrub moldy areas with a soft brush. For stubborn growth, make a baking soda paste.
4. Flush with clean water 3 times to eliminate vinegar residue.
Dry and Sanitize to Prevent Regrowth
Mistake 90% of users make: Skipping complete drying. Mold returns if moisture remains.
1. Air-dry all parts for 4+ hours—use a fan to speed drying.
2. Run 3 test cycles and discard all ice (residual cleaner affects taste/safety).
3. Clean water lines (plumbed units only): Pour 2 cups vinegar through a funnel, wait 5 minutes, then flush with 5 gallons clean water.
Built-in Refrigerator Ice Maker Rescue Protocol

Fridge units need extra steps due to complex tubing:
1. Unplug the entire refrigerator—not just the ice maker.
2. Clean the dispenser chute: Pour 3–4 cups vinegar directly into the chute. Let soak 10 minutes.
3. Replace the water filter—a contaminated filter reintroduces mold spores. Most require replacement every 6 months.
4. Scrub the ice bin: Use a vinegar-dampened cloth (never bleach near food compartments).
Warning: If mold reappears within 72 hours, your water line is infected—call a pro.
Countertop Ice Maker Mold Emergency Fix
These compact units trap water in hidden reservoirs:
1. Remove the drain cover completely—most retain ½ cup of water underneath.
2. Fill reservoir with 9:1 water-bleach solution (only for plastic units). Run one full cycle until empty.
3. Flush with 3 clean water cycles until bleach odor vanishes.
4. Tackle hard water stains: Apply baking soda paste to mineral deposits, wait 10 minutes, then rinse.
Critical: Never use bleach on stainless steel—opt for vinegar instead.
Prevent Mold From Returning in 4 Proven Ways

Your cleaning fails if you skip prevention. Implement these immediately:
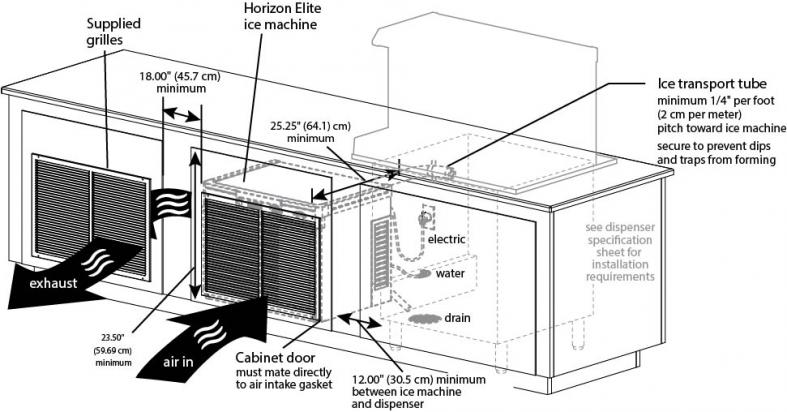
– Position for airflow: Keep 6+ inches clearance from walls and appliances.
– Deep clean every 6 months: Use vinegar monthly in high-humidity areas.
– Install a water filter: Hard water minerals feed mold—replace filters every 6 months.
– Wipe exterior daily: Yeast particles from countertops migrate inside.
Commercial secret: Restaurants use ozone generators to kill airborne spores—but these require professional installation.
When to Call a Professional Immediately
Stop DIY if you see:
– Mold in the water line (visible as black specks in ice)
– Musty odor after 3 cleanings
– Reduced ice production despite maintenance
– Cracks in the reservoir (requires part replacement)
Business owners: Health departments issue violations for moldy ice. Schedule professional service every 6 months—no exceptions.
Safety Protocol You Must Follow
During cleaning:
– Work in a ventilated area (open windows + fan)
– Never operate the machine while cleaning
– Keep kids/pets away from chemicals
After cleaning:
– Document the date and method used
– Monitor the first 20 ice batches for odors
– Set phone reminders for your next cleaning
Clean ice isn’t optional—it’s a health necessity. By following these exact steps, you’ll eliminate black mold permanently and protect your family from dangerous pathogens. Remember: E. coli survives freezing, so never serve ice with visible mold. For built-in units, replace the water filter every time you clean. Start your maintenance schedule today—your next batch of ice depends on it.
