How to Clean Calcium Buildup in Ice Maker
This post contains affiliate links. As an Amazon Associate, we earn from qualifying purchases.
That gritty white residue coating your ice maker isn’t just unattractive—it’s actively choking your appliance’s performance. Calcium buildup forms when hard water freezes, trapping minerals that create rock-hard scale capable of slashing ice production by 40% or more. Left unchecked, these deposits will eventually force costly repairs or replacement. The good news? You can completely restore your ice maker’s function using simple household items or specialized cleaners in under 60 minutes.
This guide delivers battle-tested methods to eliminate calcium deposits safely, whether you’re dealing with light surface film or severe clogs. You’ll discover exactly how to diagnose buildup severity, choose the right cleaning approach for your machine type, and implement foolproof prevention strategies. Most importantly, you’ll learn professional techniques to keep your ice maker producing crystal-clear cubes for years.
Spot Calcium Buildup Before It Destroys Your Ice Maker
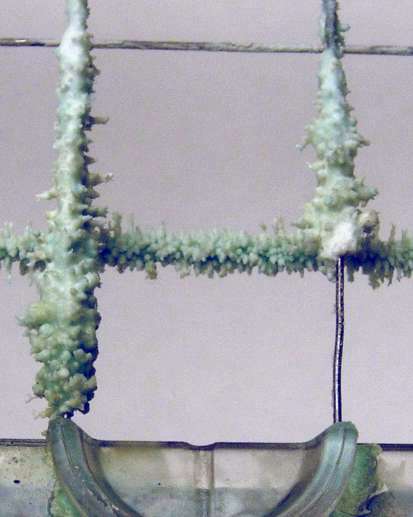
Calcium deposits form as hard water freezes, shedding calcium and magnesium particles that accumulate into stubborn scale. This process accelerates dramatically in areas with water hardness above 180 ppm, where visible buildup can appear within weeks. Recognizing early warning signs prevents irreversible damage to critical components like the evaporator plate and water inlet valve.
Critical symptoms demanding immediate action:
– Ice cubes with cloudy centers or white specks
– Noticeable metallic or chalky taste in beverages
– Reduced ice output despite normal machine operation
– Extended freezing cycles taking 50% longer than usual
– Visible white flakes floating in your drinks
Severe buildup restricts water flow through distribution tubes, forces the compressor to overwork, and insulates the evaporator plate—reducing heat transfer efficiency by up to 75%. Ignoring these signs leads to complete system failure within months.
Gather Exact Supplies for Your Ice Maker Type
Using incorrect cleaners can void warranties or damage components. Match your supplies to your machine’s specifications before starting:
For standard home ice makers (whirlpool, frigidaire, GE):
– White vinegar (undiluted for heavy buildup)
– Soft-bristled toothbrush (never use metal scrubbers)
– Microfiber cloths for drying
– Replacement water filter (if equipped)
For commercial units (hoshizaki, scotsman, manitowoc):
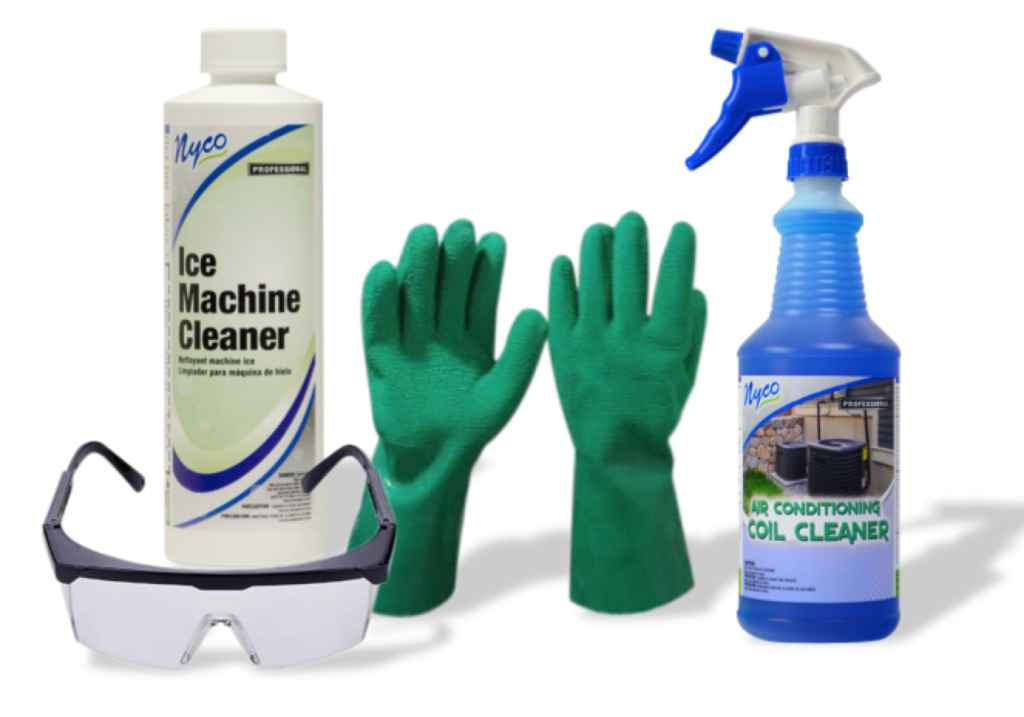
– Affresh® Ice Machine Cleaner (stainless steel safe)
– Nickel-safe descaler (for non-stainless components)
– Chemical-resistant gloves and safety glasses
– Acid-resistant brush for muriatic acid applications
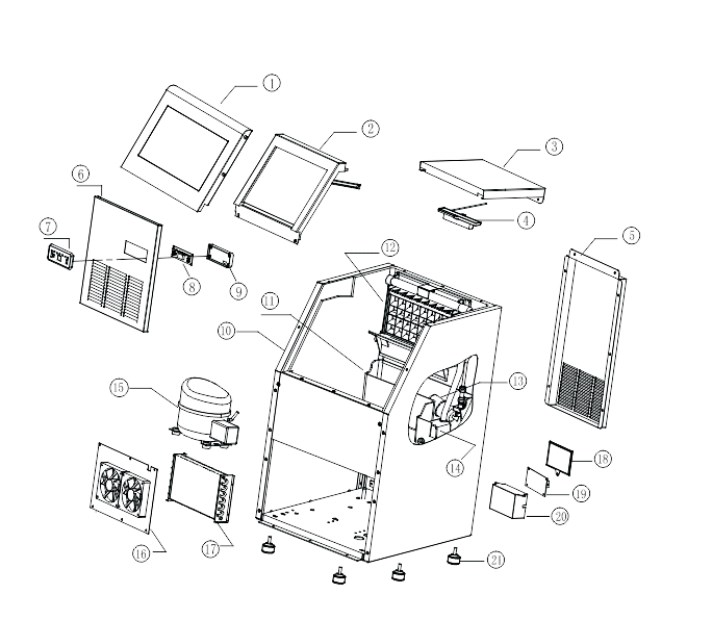
Pro verification step: Examine your evaporator plate. If it’s shiny silver, it’s nickel-plated—requiring nickel-safe cleaners only. Stainless steel plates (dull gray) can handle stronger acid-based solutions.
Diagnose Buildup Severity in 3 Minutes
Before cleaning, assess damage level with this visual inspection:
- Power down completely and remove all ice from the bin
- Locate the evaporator plate (freezing surface where ice forms)
- Check for deposits on:
– Water distribution tubes (look for white crust inside openings)
– Evaporator plate surface (gritty texture = moderate buildup)
– Water inlet valve (blockage causes slow filling)
Buildup severity guide:
– Light (vinegar fixable): Thin white film easily wiped off
– Moderate (commercial cleaner needed): Crusty deposits requiring brushing
– Severe (professional help required): Scale thicker than 1/8 inch blocking water flow
Never attempt to chip hardened scale with sharp tools—this scratches surfaces and creates future buildup points.
Vinegar Cleaning Method for Home Ice Makers
This natural approach safely dissolves light-to-moderate deposits without damaging plastic components.
Prepare your solution:
– Mix 1 cup undiluted white vinegar with 1 cup warm water for regular maintenance
– Use straight vinegar for stubborn deposits (max 1-hour soak time)
Execute cleaning in 5 steps:
1. Pour solution directly into the water reservoir until full
2. Circulate for 30 minutes by running a partial ice-making cycle
3. Scrub gently with toothbrush on visible deposits (focus on water spray nozzles)
4. Discard all ice from cleaning cycles—never consume it
5. Rinse thoroughly with 3 clean water cycles until vinegar odor disappears
Critical mistake to avoid: Never heat vinegar in the ice maker—boiling temperatures warp plastic components and void warranties. If vinegar smell persists after rinsing, run additional cycles with filtered water.
Commercial Descaler Protocol for Severe Buildup
For rock-hard deposits or commercial machines, specialized cleaners work faster with less effort.
Affresh® application (stainless steel units):
1. Empty water reservoir completely
2. Pour entire 16oz bottle into reservoir
3. Add 32oz water (fill empty bottle twice)
4. Run 2 full ice-making cycles, discarding all ice
5. Perform 3 rinse cycles with clean water
Nickel-safe descaler process (most home units):
– Follow manufacturer dilution ratios precisely (typically 1:4 cleaner to water)
– Soak removable parts for 20 minutes max
– Rinse twice as long as vinegar method—mineral residue causes metallic taste
Safety non-negotiables: Always wear gloves with acid-based cleaners. Work in ventilated areas—acid fumes can cause respiratory irritation. Never mix different chemical cleaners.
Deep Clean Removable Components Separately
Detachable parts require individual treatment for complete calcium removal:
Ice bin and scoop:
– Wash with warm water and mild dish soap
– Apply baking soda paste (2 tbsp baking soda + water) to stubborn spots
– Rinse 3x to eliminate residue causing off-flavors
Water filter replacement:
– Always install new filter after descaling—old filters harbor bacteria and minerals
– Run 4 rinse cycles before using ice for consumption
Evaporator plate cleaning:
– Soak in vinegar solution for 20 minutes max
– Brush gently along grooves with soft toothbrush
– Never use paper towels—they leave fibers causing ice adhesion issues
Pro tip: Photograph part positions before disassembly. Misaligned components cause 30% of post-cleaning malfunctions.
Muriatic Acid Treatment for Commercial Emergencies
WARNING: Only for trained technicians handling severe industrial buildup. This dissolves concrete-like scale but requires extreme caution.
Safe application sequence:
1. Mix 1 part muriatic acid to 10 parts water (ALWAYS add acid to water)
2. Apply with acid-resistant brush to affected areas only
3. Wait MAX 3 minutes—scale dissolves rapidly
4. Flush immediately with 5+ gallons clean water
5. Run 6 rinse cycles before resuming operation
Absolute prohibitions: Never use on aluminum parts, galvanized components, or machines with nickel plating. Acid exposure causes irreversible corrosion within minutes.
Prevent Calcium Buildup Before It Starts
Stop deposits at the source with these proven strategies:
Install targeted filtration:
– Reverse osmosis systems remove 95% of hardness minerals
– Phosphate filters bind calcium ions before they reach the ice maker
– Whole-house softeners exchange calcium for sodium (ideal for very hard water)
Follow this maintenance schedule:
– 0-60 ppm water: Clean every 9 months
– 61-120 ppm: Clean every 6 months
– 121+ ppm: Clean every 3 months + monthly vinegar rinse
Daily prevention habits:
– Wipe interior with vinegar solution weekly
– Empty ice bin completely every 7 days (old ice concentrates minerals)
– Test water hardness quarterly using $5 test strips
When to Call a Professional Immediately
Seek expert help if you notice:
– Ice production stops completely after proper cleaning
– Water leaks from housing seams (indicates cracked components)
– Calcium returns within 2 weeks of thorough descaling
– Grinding noises during operation (scale damaging gears)
Commercial units in restaurants or healthcare facilities require professional service every 6 months regardless of visible buildup. Technicians perform critical tasks like water quality testing, phosphate injector maintenance, and evaporator plate inspections you can’t safely replicate.
Monthly Ice Maker Maintenance Checklist
Print this and tape it inside your ice maker door:
Weekly:
– [ ] Empty and wash ice bin with vinegar solution
– [ ] Wipe door gasket to prevent mineral-trapping cracks
Monthly:
– [ ] Run vinegar cleaning cycle (1 cup vinegar + reservoir water)
– [ ] Inspect water lines for cloudiness
– [ ] Replace water filter if indicator lights
Quarterly:
– [ ] Deep clean evaporator plate
– [ ] Check drain for mineral blockage
Clear ice isn’t just about appearance—it’s proof your machine operates efficiently. By following these precise cleaning protocols and prevention strategies, you’ll extend your ice maker’s lifespan by 3+ years while eliminating bitter tastes and cloudy cubes. Start with the vinegar method for light buildup, escalate to commercial descalers for stubborn deposits, and install proper filtration to stop calcium at the source. Your next drink deserves perfect ice—and your wallet will thank you for avoiding $300+ repair bills.