How to Clean Hoshizaki Ice Maker: Quick Steps
This post contains affiliate links. As an Amazon Associate, we earn from qualifying purchases.
Nothing ruins a busy restaurant shift faster than cloudy, foul-tasting ice—or worse, a health inspector flagging your machine. Whether you run a bustling café or manage a hotel kitchen, knowing how to clean Hoshizaki ice maker properly isn’t just good practice—it’s essential for food safety, warranty protection, and maintaining that crystal-clear ice your customers expect.
This guide walks you through the exact cleaning process Hoshizaki recommends, broken down into manageable steps that prevent costly mistakes. You’ll learn the critical differences between descaling, disinfecting, and sanitizing (hint: they’re not interchangeable), plus model-specific procedures that save you hours of troubleshooting. If your ice maker produces less ice or your customers complain about off-flavors, these cleaning steps will restore performance and ensure compliance.
Why Your Hoshizaki Ice Machine Needs Annual Deep Cleaning
Skipping regular deep cleaning voids your Hoshizaki warranty faster than a cracked evaporator. The manufacturer specifies annual cleaning as a minimum, but most commercial operations need it every 3-6 months—especially if you have hard water or run a bakery where yeast particles contaminate the air. Scale buildup doesn’t just reduce ice production; it creates breeding grounds for mold and bacteria that compromise food safety.
The built-in “Wash” cycle fools many operators—it only cleans half the food contact surfaces. Real cleaning requires three distinct processes: descaling (removing mineral deposits), disinfecting (killing microorganisms), and sanitizing (creating protective barriers). Without all three steps, you’re leaving behind contaminants that affect ice quality and machine longevity.
Essential Safety Gear and Chemicals You Must Use

Before touching any chemicals, gear up properly—liquid-proof safety gloves aren’t optional. Descaler chemicals will burn through standard dishwashing gloves, and safety glasses protect against splashes when draining tanks under pressure. Never mix cleaning and sanitizing solutions—the fumes create toxic gases that can hospitalize your entire staff.
Critical chemical requirements:
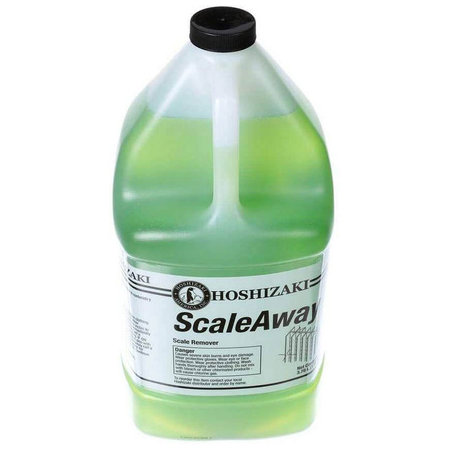
– Hoshizaki Scale Away descaler (or approved ice machine cleaner)
– EPA-registered bleach safe for food contact
– Warm water and clean cloths
– Spray bottles for controlled application
– Test strips to verify 200 ppm chlorine concentration
Avoid these dangerous mistakes:
– Using ammonia-based cleaners (corrodes internal components)
– Leaving the toggle switch in “Wash” position with an empty tank (destroys water pump seals)
– Skipping safety glasses (chemical splashes can cause permanent eye damage)
Power Down and Drain Your Hoshizaki Ice Maker Completely
Start every cleaning session the same way: flip the control switch to OFF, then shut off the water supply valve. If your model lacks a valve, disconnect the water line entirely. Empty the storage bin completely—FDA regulations allow storing ice in clean containers in your freezer during cleaning, but transport it properly.
Remove front panels and any access panels specific to your model. Each machine drains differently; some use plugs, others require hose removal. Get every drop out—residual water dilutes your cleaning solutions. Install a fresh water filter while you’re at it. Running cleaning chemicals through an old filter wastes both time and money.
KM Series Modular Cubers: Precise Cleaning Procedures
Cleaning Crescent Cubers (KM-340/515/600/650/901 Models)
Descaling Process:
1. Add 14 fluid ounces of Scale Away directly to the water tank
2. Turn the cleaning valve left to open position
3. Switch to “WASH” for 30 minutes of circulation
4. Drain completely and reattach all hoses
Sanitizing Process:
1. Close cleaning valve (turn right)
2. Switch to “ICE” for 3-4 minutes to refill tank
3. Add 0.78 fluid ounces of chlorine bleach
4. Open cleaning valve (turn left)
5. Switch to “WASH” for 45 minutes
6. Drain completely
Critical Tip: Run three complete rinse cycles to eliminate chemical residue. Close the cleaning valve, switch to “ICE” for 3-4 minutes, then drain. This ensures zero chemical taste affects your first batch of ice.
Larger Crescent Cubers (KM-1100/1340/1601 Models)
The process mirrors smaller models but requires 30 fluid ounces of descaler and 1.7 fluid ounces of bleach for sanitizing. These larger units often have more complex drainage systems—consult your manual for specific hose configurations. Pay special attention to the reservoir corners where scale accumulates most heavily.
Self-Contained Models: AM Series Simplified Cleaning

AM-100BAE and AM-150BAF/BWF models streamline the process but still require thorough attention:
Water System Cleaning:
1. Mix 5 fluid ounces Scale Away with 1 gallon water
2. Drain tank completely, add solution
3. Run “WASH” cycle for 30 minutes
4. Drain and rinse thoroughly
Sanitizing:
1. Mix 0.5 fluid ounces bleach per 1 gallon water
2. Add to empty tank, run “WASH” for 15 minutes
3. Complete multiple rinse cycles
Pro Tip: These models accumulate scale faster in the water distribution system. Use a soft brush to gently scrub the water trough during cleaning—this prevents reduced water flow that causes thin or hollow ice cubes.
Component Deep Cleaning That Prevents Health Code Violations
Ice Bin and Storage Components
Remove all detachable parts. Spray interior surfaces with descaling solution and let it work for 20+ minutes—don’t rush this step. Use a nylon brush for stubborn scale, then rinse completely.
Disinfect with a stronger bleach solution (6 ounces per gallon) for 10 minutes minimum wet contact time. Rinse thoroughly, then apply final sanitizing solution (2 teaspoons bleach per gallon) and air dry—no rinsing required for the sanitizer.
Evaporator Assembly
Stainless steel evaporators handle stronger cleaners than nickel-plated units. Use specialized evaporator brushes for stubborn scale deposits. The descaling and sanitizing procedures mirror your main cleaning process—consistency prevents missed spots that cause uneven freezing.
Exact Cleaning Solution Formulations for Perfect Results
Descaling Mix
Hoshizaki Scale Away comes concentrated—dilute per your model’s specifications. This acidic solution requires gloves and eye protection but effectively strips mineral deposits without damaging stainless steel components.
Disinfecting Solution
Mix 6 ounces of bleach per 1 gallon of water. This stronger concentration kills mold and bacteria but requires complete rinsing. Maintain 10-minute wet contact time for full effectiveness.
Sanitizing Solution
Final protection uses 2 teaspoons bleach per 1 gallon of water (200 ppm chlorine). Air-dry completely—rinsing removes the protective barrier you’re creating. Use test strips to verify concentration—improper levels either damage components or fail to sanitize properly.
Restart Procedures and First Batch Protocol
After three complete rinse cycles, reassemble all components in reverse order. Switch to “ICE” mode and discard the first full batch of ice—this eliminates any remaining chemical taste and ensures your machine produces safe, clean ice.
Clean air filters during each deep cleaning cycle. Blocked condensers reduce production efficiency by up to 25% and trigger unnecessary service calls. Check your condenser coils for grease buildup—this is especially critical in kitchen environments with high airborne grease.
Maintenance Schedule That Prevents Emergency Shutdowns
Deep cleaning requirements:
– Annual minimum for warranty compliance
– Every 6 months with hard water (test your water hardness quarterly)
– Every 3-6 months in yeast-heavy environments like bakeries
Daily maintenance:
– Sanitize ice scoop after each use
– Wipe down bin door after ice removal
– Check for unusual sounds or reduced production
Monthly tasks:
– Clean ice bin liner with pH-neutral detergent
– Inspect water filter for discoloration
– Verify proper ice cube formation
When to Call a Professional for Hoshizaki Ice Maker Service
While this guide covers comprehensive manual cleaning, professional technicians provide complete disassembly of compressors and condensers—areas requiring specialized tools and training. Consider professional service if:
- Scale blocks internal components despite regular cleaning
- Your business can’t operate with depleted ice supply
- You notice persistent musty odors after cleaning
- The machine fails to produce ice after proper maintenance
Hoshizaki warranties specifically exclude failures due to scale buildup. Following these exact procedures maintains warranty validity while preventing the costly repairs that neglect guarantees.
Your ice maker works harder than most kitchen equipment. Treat it to proper cleaning using these Hoshizaki-approved methods, and it’ll reward you with years of crystal-clear ice and zero health code violations. Remember: how to clean Hoshizaki ice maker isn’t just about following steps—it’s about protecting your customers, your reputation, and your bottom line. Schedule your next cleaning session today before scale buildup turns a simple maintenance task into an emergency repair.
