How to Clean Manitowoc Ice Maker: Easy Steps
This post contains affiliate links. As an Amazon Associate, we earn from qualifying purchases.
A neglected Manitowoc ice maker becomes a hidden health hazard, harboring dangerous bacteria, mold, and scale that compromise both ice quality and customer safety. When your ice develops unpleasant odors, cloudy appearance, or production drops significantly, these aren’t just operational quirks—they’re urgent warnings that demand immediate cleaning action. Learning how to clean Manitowoc ice maker units properly ensures every cube meets stringent food safety standards while restoring optimal performance. This comprehensive guide delivers the exact procedures recommended by Manitowoc, so you can eliminate contaminants and maintain consistent ice production in your commercial kitchen.
Regular deep cleaning isn’t optional—it’s critical for equipment longevity and public health. Scale buildup from hard water alone can reduce ice production by 30% while increasing energy consumption. Worse, environments like bakeries and breweries face accelerated microbial growth due to airborne yeast. Without proper maintenance, your ice maker transforms from a kitchen asset into a liability. This guide provides the precise steps to safely descale, disinfect, and sanitize your unit, ensuring compliance with health regulations while protecting your business reputation.
You’ll discover the three-step cleaning process that professionals use, essential safety precautions for handling chemicals, and model-specific variations that prevent costly mistakes. Whether you’re maintaining a busy restaurant or catering facility, this actionable guide empowers you to keep your Manitowoc ice maker producing crystal-clear, great-tasting ice year-round.
Essential Supplies for Cleaning Your Manitowoc Ice Maker

Gather these specific supplies before starting your cleaning process to ensure safety and effectiveness. Using incorrect products or dilutions risks equipment damage and health code violations.
Precise Descaling Solution Requirements
Manitowoc requires an acid-based commercial descaler specifically formulated for ice machines—never substitute household vinegar. Purchase EPA-registered descalers from restaurant supply stores or authorized online vendors. Prepare a 50/50 mixture with water for soaking components, following manufacturer concentration guidelines exactly. Scale appears as chalky white deposits on metal surfaces and must be fully dissolved before proceeding to disinfection.
Critical Bleach Solution Formulas
Disinfection solution: Mix precisely 6 ounces of EPA-registered bleach per 1 gallon of water. This solution requires 10 minutes of continuous wet contact time to kill pathogens, followed by thorough rinsing.
Sanitization solution: Use only 2 teaspoons bleach per gallon of water for the final step. This diluted solution air-dries without rinsing to meet federal food safety standards.
Never mix bleach with descaler or other cleaners—this creates toxic chlorine gas that can cause respiratory damage.
Must-Have Tools and Safety Gear
- Soft-bristle nylon brushes (never metal or abrasive pads)
- Two dedicated spray bottles (clearly labeled for disinfectant/sanitizer)
- Food-grade sanitizer approved for ice machines
- Clean microfiber towels (no lint)
- Basic screwdriver set for panel removal
- Rubber gloves and eye protection
Power Down and Prep Your Ice Machine Safely
Skipping proper shutdown risks electrical hazards and incomplete cleaning. Follow these critical steps before touching any components.
Complete Power and Water Isolation
First, switch off the ice maker using the main power toggle, then unplug it from the electrical outlet—never rely solely on the machine’s power switch. Locate the dedicated water shut-off valve (typically within 18 inches of the unit) and turn it clockwise until fully closed. Verify water flow stops by briefly opening the service valve; if water continues, shut off the main building supply.
Ice Removal and Bin Inspection Protocol
Empty the entire ice bin into clean, covered containers—never leave ice inside during cleaning. Discard any ice produced within 24 hours before cleaning, as it may contain contaminants. While emptying, inspect for:
– Slimy residue (indicates microbial growth)
– Cloudy or discolored ice (signals mineral buildup)
– Unusual odors (sign of bacterial contamination)
This inspection reveals whether your cleaning frequency needs adjustment.
Access Panel Removal Sequence
Remove the front service panel by loosening retaining screws with a Phillips head driver. Carefully detach the evaporator plate cover, noting wire connections for reassembly. Set all components on a clean towel in a dust-free area. Critical step: Replace your water filter now if it’s been six months since last change—dirty filters accelerate scale formation.
Execute the Three-Step Deep Cleaning Process
Manitowoc’s three-stage cleaning sequence is non-negotiable for food safety. Skipping steps leaves harmful residues or pathogens.
Step 1: Remove Mineral Scale Deposits
With the machine in clean mode (or pressing the clean button on newer models), pour your 50/50 descaler solution into the water reservoir. Allow the unit to run its automatic cycle—newer models perform six rinse cycles automatically. Pro tip: Place a towel under the drain to catch overflow during descaling. If white scale remains after 10 minutes, repeat the cycle with fresh solution before proceeding. For stubborn deposits, remove the evaporator plate and soak it in descaler solution for 15 minutes before gentle brushing.
Step 2: Disinfect All Critical Surfaces
Apply the 6-ounce bleach solution to every interior surface using your labeled spray bottle:
– Evaporator plate channels
– Water distribution troughs
– Ice bin walls and door seals
– Storage bin corners (where mold hides)
Maintain 10 minutes of constant wetness—reapply if surfaces dry. Warning: Never spray near electrical components. Rinse every surface thoroughly with clean water using a spray bottle; residual bleach will taint ice.
Step 3: Final Sanitization for Food Contact
Spray the 2-teaspoon bleach solution on all food-contact surfaces. Unlike disinfection, do not rinse—allow air drying to achieve safe bacterial reduction. Focus on:
– Ice chute surfaces
– Scoop storage areas
– Drainage channels
– Bin lid interiors
This step meets FDA food code requirements when performed correctly.
Component-Specific Cleaning Procedures
Generic cleaning misses critical areas where contaminants thrive. Target these high-risk zones.
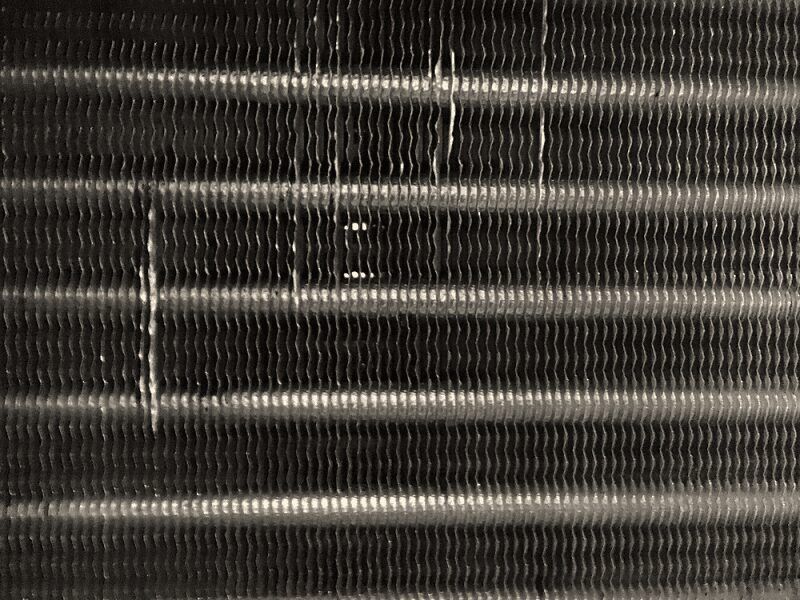
Evaporator Plate Deep Treatment
Remove the plate by loosening retaining bolts with a 5/16″ wrench. Soak in descaler solution for 10-15 minutes, then scrub channels with a soft brush using circular motions. Rinse under running water until water runs clear. Inspect for hairline cracks—replace immediately if damaged, as cracks harbor bacteria. Dry completely with lint-free towels before reinstallation.
Water Distribution System Unclogging
Detach the water distributor from the evaporator’s top. Soak in warm sanitizing solution for 5 minutes, then use a pipe cleaner brush to clear each nozzle. Key indicator: If water doesn’t flow freely from all nozzles, mineral deposits are reducing ice production. Rinse thoroughly and reinstall at the correct height—misalignment causes uneven freezing.
Ice Bin Sanitization Protocol
Remove the entire bin and wash with mild detergent in warm water. Scrub corners and seams where antimicrobial polyurethane lining collects mold. Rinse three times to eliminate soap residue. Air-dry completely before reinstalling—never use towels that may transfer lint. The lining slows growth but doesn’t prevent it; visible slime means you need more frequent cleanings.
Condenser Maintenance That Prevents Breakdowns
Condenser neglect causes 60% of Manitowoc service calls. Clean these components quarterly—not just during deep cleans.
Air-Cooled Condenser Cleaning Method
For self-contained units, use compressed air at 30 PSI to blow debris from fins in the opposite direction of airflow. For remote condensers mounted outside, remove leaves and insects with a soft brush. Never use water—moisture damages electrical components. Clean when fins show 25% coverage; restricted airflow reduces ice production by 15-20%.
Water-Cooled System Warning
Do not attempt DIY cleaning on water-cooled condensers. These require professional servicing due to complex plumbing and chemical treatment requirements. Attempting self-cleaning voids warranties and risks flooding.
Restart Verification and Troubleshooting
Rushing restart causes contaminated ice or equipment damage. Follow this validation sequence.
Safe System Reactivation
Reinstall components in reverse order: evaporator plate (torque bolts to 15 in-lbs), water distributor, access panels. Open the water valve slowly to purge air from lines. Restore power and monitor the first cycle closely. Discard the initial ice batch—it may contain cleaning residue. Run two full cycles before using ice.
Critical Quality Checks During First Cycle
Watch for these red flags:
– Cloudy ice or chemical smells: Incomplete rinsing—run three additional cycles
– Water leaks at connections: Overtightened fittings or damaged gaskets
– Reduced ice production: Clogged water nozzles or improper distributor height
– Unusual humming: Condenser airflow obstruction
When to Call Manitowoc Professionals
DIY cleaning works for routine maintenance, but these situations require certified technicians.
Four Emergency Service Indicators
- Scale won’t dissolve after three descaling attempts—indicates severe mineral damage
- Corrosion on evaporator plate—requires replacement and system flushing
- Persistent low production post-cleaning—points to refrigerant issues
- Visible mold in water lines—requires ultraviolet sanitation treatment
Professional Service Advantages
Certified technicians protect ice quality during cleaning using food-safe inhibitors. They maintain digital service logs for health inspections and spot emerging issues like failing pumps. In high-yeast environments (breweries/bakeries), professionals use accelerated cleaning protocols that prevent recurring contamination.
Maintenance Schedule for Continuous Operation
Follow this calendar-based system—not just symptom-driven cleaning—to avoid emergencies.
| Frequency | Critical Tasks |
|---|---|
| Daily | Wipe exterior stainless steel; sanitize ice scoop; check for slime |
| Weekly | Inspect ice clarity/taste; clean bin door seals; empty drip tray |
| Monthly | Clean condenser fins; verify water filter pressure; check cube size |
| Quarterly | Deep-clean water nozzles; inspect all gaskets; log cleaning results |
| Biannually | Full three-step cleaning; replace water filter; professional inspection |
Health department compliance tip: Document every cleaning with date, technician name, solutions used, and verification signatures. Some jurisdictions require specific sanitizer ratios—always check local codes.
Safety Compliance Non-Negotiables
Ignoring these requirements risks health violations and equipment damage.
Model-Specific Safety Rules
Always consult your unit’s manual—newer Manitowoc models (Indigo series) have automatic cleaning cycles that reduce manual steps, while legacy units require full disassembly. Never clean near live electrical components—verify power is disconnected at the breaker. Use only Manitowoc-approved descalers; generic acids damage stainless steel.
Emergency Response Protocol
If you accidentally mix bleach and descaler:
1. Evacuate the area immediately
2. Shut off power at main breaker
3. Ventilate the space for 30+ minutes
4. Call poison control (1-800-222-1222)
Properly executed, your how to clean Manitowoc ice maker routine ensures every cube meets safety standards while maximizing equipment lifespan. By following this biannual deep cleaning protocol and quarterly condenser maintenance, you’ll avoid 90% of common service issues while delivering perfect ice. Mark your calendar today for the next cleaning—your customers’ health depends on it.