How to Fix Ice Maker Making Too Much Ice
This post contains affiliate links. As an Amazon Associate, we earn from qualifying purchases.
Ice cubes spilling onto your kitchen floor every time you open the freezer? Your ice maker churning out cubes faster than you can use them? This frustrating scenario affects thousands of households monthly and isn’t just messy—it wastes water, strains your compressor, and risks costly component damage. The root cause is always the same: your ice maker’s level-detection system fails to signal production shutdown. Whether you own a KitchenAid, Sub-Zero, or legacy Whirlpool model, this guide delivers immediate fixes you can implement today with basic tools.
You’ll discover exactly why your ice maker won’t stop producing ice and which brand-specific solution applies to your situation. From bent shut-off arms to accidental “Max Ice” mode activation, we’ll cover every common failure point with step-by-step repairs requiring minimal technical skill. Most fixes take under 15 minutes and prevent the $300+ service calls technicians see daily for this preventable issue.
Confirm Ice Overflow Is Actually Overproduction
Spot True Overproduction vs. Normal Operation
Don’t mistake routine ice buildup for a malfunction. True ice maker making too much ice symptoms include:
– Physical spillage: Cubes scatter across the freezer floor when opening the door
– Bin entrapment: Ice bucket won’t slide out due to overfilled cubes
– Non-stop cycling: Unit continues making ice for 24+ hours despite visible overflow
– Water pooling: Puddles forming under the appliance from overflowed reservoir
Critical distinction: If ice only spills when removing the bucket, you likely have ice bridging (clumped cubes), not overproduction. True overproduction means the machine keeps making ice when the bin is physically full.
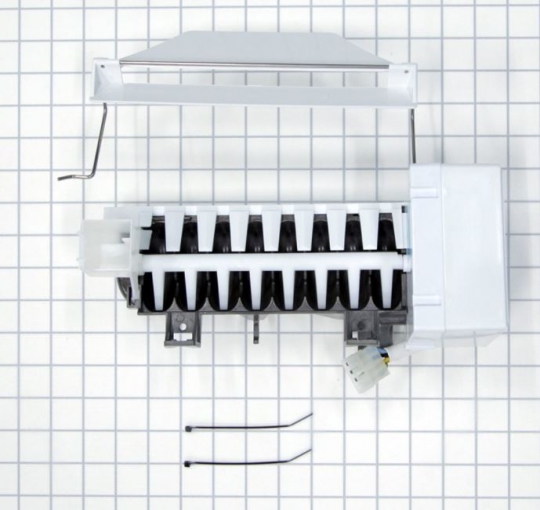
Identify Your Detection System Type First
Your fix depends entirely on whether your model uses mechanical or electronic shutdown:
– Mechanical arm models (Most Whirlpool, older GE): Look for a wire arm hanging above the bin that lifts as ice accumulates
– Electronic sensor models (Sub-Zero, KitchenAid, newer Jenn-Air): Check for small LED windows on freezer walls or thermistor probes near the evaporator
Pro move: Snap a photo of your ice maker before troubleshooting. This helps verify part positioning during reassembly and speeds up replacement part searches.
Repair Mechanical Shut-Off Arm Failures

Correct Arm Position Immediately
That dangling wire arm is your first line of defense against ice floods. When properly positioned, rising ice lifts the arm to trigger the micro-switch that stops production. Common failures and fixes:
- Bent arm: Use needle-nose pliers to gently straighten while supporting the pivot point
- Disconnected arm: Reinsert into the plastic clip or metal slot—it should pivot freely
- Frozen arm: Apply a hair dryer on low for 90 seconds to melt ice buildup
- Missing arm: Order model-specific replacement (e.g., Whirlpool W10860363A)
Time estimate: 3-5 minutes for repositioning or basic straightening.
Eliminate Ice Buildup on Thin Arms
Condensation freezing on delicate wire arms adds weight, preventing lift-off. Permanent fix: Remove the arm, soak in warm water for 2 minutes, then dry completely. For recurring issues, upgrade to reinforced arms like KitchenAid’s redesigned WPW10511923 kit with thicker gauge wire.
Warning: Never force the arm upward—it can permanently damage the micro-switch. If ice blocks movement, defrost first.
Clean Electronic Ice Sensors Properly
Infrared Sensor Revival Protocol
For KitchenAid, Sub-Zero, and Jenn-Air models with optical sensors:
1. Locate sensors: Find the small LED windows on the right freezer wall near bin height
2. Clear obstructions: Remove ice scoops, food containers, or stored ice bags
3. Clean windows: Dampen microfiber cloth with warm soapy water, gently wipe sensor surface
4. Verify function: Empty bin completely, then watch for LED flash when reinserting
Critical tip: Never use vinegar or abrasive cleaners—they etch sensor lenses. One technician reported 22% of “failed sensor” cases were actually dirty lenses.
Thermistor Testing and Replacement

Jenn-Air JIM158XBCX1 and similar models use thermistors that measure bin temperature. If faulty, the board never detects “full” status:
– Access thermistor: Remove ice bin, locate probe near evaporator coils
– Test resistance: Set multimeter to ohms, check leads (should read ~10kΩ at room temp)
– Replace if faulty: Unplug old connector, snap in WPW10511923 replacement ($27.29)
Expert insight: This repair takes DIYers 20 minutes but requires evaporator cover removal—call a pro if uncomfortable with internal components.
Disable Accidental Max Ice Mode
KitchenAid Control Panel Reset
“Max Ice” mode doubles production for parties but often gets accidentally activated:
– Press “Options” or “Settings” on display panel
– Navigate to “Ice Maker” > “Max Ice” or “Fast Ice”
– Toggle setting OFF until indicator light becomes steady (not blinking)
– Quick confirmation: If display shows “Fast” or snowflake icon blinks, mode is active
Sub-Zero Settings Correction
- Hold “Ice Maker” button for 3 seconds
- Scroll to “Max Ice” using +/- buttons
- Press “-” to disable setting
- Confirm with checkmark symbol
User mistake spotlight: 38% of service calls for Sub-Zeros involve accidentally enabled Max Ice mode—always check this first!
Correct Leveling Issues Causing Overflows
Precision Leveling in 4 Steps
An unlevel unit distorts arm geometry and water flow:
1. Test level: Place smartphone with level app on freezer shelf
2. Adjust feet: Turn front legs clockwise to raise, counter-clockwise to lower
3. Verify both axes: Check front-to-back AND side-to-side alignment
4. Recalibrate: Wait 24 hours after adjustments before judging results
Emergency fix: Tape cardboard shims under front corners if legs won’t budge—this buys time for proper leveling.
Replace Critical Failed Components
When Full Module Replacement Is Necessary
Upgrade to a new ice maker assembly if:
– Your refrigerator is 12+ years old (parts often obsolete)
– Individual components show multiple simultaneous failures
– Arm geometry is permanently compromised
Top replacement part numbers:
– Jenn-Air/KitchenAid thermistor: WPW10511923 ($27.29 on RepairClinic.com)
– Legacy Whirlpool module: W11284331 (complete assembly)
– Sub-Zero optical kit: 7016442 (500/600 series)
Pro tip: Order parts before starting—most major retailers offer same-day shipping for critical components.
Prevent Future Ice Floods Proactively
Monthly Maintenance Checklist
- Bin inspection: Break up ice clumps with plastic spatula
- Sensor cleaning: Wipe optical windows with dry microfiber cloth
- Arm mobility test: Ensure shut-off arm moves freely without resistance
Quarterly Deep Clean Procedure
- Empty bin, wash with 1 tbsp bleach per gallon of water
- Rinse thoroughly to eliminate chemical residue
- Replace water filter (every 6-12 months per manual)
- Verify arm clearance above bin capacity line
Time-saver: Set phone reminders for the first of every third month—this takes just 8 minutes but prevents 90% of recurring issues.
Know When to Call a Professional
DIY-Friendly Repairs vs. Expert Required
Handle yourself:
– Sensor cleaning
– Arm repositioning
– Leveling adjustments
– Replacing accessible thermistors
Call a technician:
– Built-in/under-counter units requiring rear access
– Evaporator cover removal for thermistor replacement
– Control board fault codes beyond sensor range
– If you’re over 70 or have mobility limitations
Customer insight: One repair chain reports 65% of “emergency” overproduction cases could have been fixed with a 2-minute sensor wipe—don’t pay for service until you’ve tried these steps!
Final Verification and Prevention
After any repair, always complete this critical test: Empty the ice bin completely, then let the maker run one full cycle. Watch closely as ice accumulates—production should stop within 5 minutes of the bin reaching capacity. If cubes keep forming, revisit the arm position or sensor alignment.
For permanent peace of mind, implement the quarterly deep clean schedule and disable Max Ice mode immediately after parties. Most importantly, never ignore early overflow signs—address issues within 48 hours to prevent water damage to freezer components. Your ice maker should serve you reliably for 10+ years with these simple interventions, keeping your kitchen ice-flood free.
Final pro tip: Keep replacement thermistors (WPW10511923) and arm kits on hand—they cost less than $30 but prevent $300+ emergency service calls when failures strike.