How to Fix Manitowoc Ice Maker Not Working
This post contains affiliate links. As an Amazon Associate, we earn from qualifying purchases.
Your Manitowoc ice maker just died mid-rush hour—no familiar hum, no clinking cubes, just a silent machine while customers demand cold drinks. When your Manitowoc ice maker not working situation hits, 80% of failures stem from five easily fixable issues. Before calling a technician or canceling happy hour, follow this targeted guide to diagnose and solve the problem yourself. You’ll discover exactly why your machine stalled, how to spot critical warning signs like red wrench indicators, and proven steps to restart ice production—often in under 30 minutes. This isn’t generic advice; it’s distilled from Manitowoc’s service protocols into actionable fixes for every model.
Power Failure Signs & Quick Fixes
No Response When Plugged In
Start with the most common culprits before assuming complex failure. First, verify your machine receives power: unplug the cord and firmly reconnect it to a kitchen outlet known to work (test it with a coffee maker). Next, locate your electrical panel and check for tripped breakers labeled “kitchen equipment”—flip any that aren’t fully in the ON position. Crucially, inspect the water curtain (the plastic flap inside the machine) to ensure it’s upright and swings freely. If jammed downward, the safety sensor prevents startup. After these checks, press the power button. A solid blue light confirms power is reaching the control board. No light? Move to circuit-level diagnostics.
Red Wrench Light Diagnosis
That red wrench indicator is your machine’s emergency signal. Understand what it means before reacting: a blinking red wrench means the control board detected a temporary fault like a momentary power dip. Press the power button to reset it—this often clears the error. But if the wrench glows solid red, stop immediately. This signifies critical hardware failure in components like the compressor or evaporator. Continuing operation risks catastrophic damage. Unplug the machine and contact an authorized Manitowoc technician—this isn’t a DIY fix.
Safety Limit Shutdown Recovery
When your ice maker stops mid-cycle but restarts after unplugging, it’s hitting safety limits to prevent damage. Here’s how to recover safely: Switch the unit OFF completely. Wait 10-15 minutes for all ice to melt from the evaporator plate (timing varies by model). Power back ON and monitor for 30 minutes. If it shuts down again within that window, the issue is persistent—schedule professional service. Never bypass this safety feature; it protects expensive components from overheating.
Zero Ice Production Troubleshooting
/But-wait-there%E2%80%99s-More!/Picture2.png.aspx)
Water Supply Blockages
No water means no ice. Diagnose flow issues systematically:
| Problem Spot | What to Look For | Fix |
|---|---|---|
| Shut-off valve | Handle parallel to pipe = closed | Turn handle 90° to perpendicular position |
| Kinked line | Visible bends near connections | Straighten tubing or replace damaged section |
| Frozen line | Ice visible in clear sections | Thaw with hair dryer on LOW (never use open flame) |
| Clogged filter | Pressure drop >15 PSI | Replace with OEM water filter |
Pro Tip: Disconnect the supply line and run water into a measuring cup. Weak flow here points to building plumbing issues—not your ice maker. Fix this first.
Contamination & Buildup Issues
Mineral deposits silently sabotage production. Focus on these critical zones:
– Ice thickness probe: Scale here tricks sensors into thinking ice is ready prematurely. Clean monthly with nickel-safe descaler.
– Water distribution tubes: Remove and soak in vinegar solution if ice sheets look uneven or thin.
– Inlet valve screen: Unscrew the valve and rinse the mesh screen under warm water—debris smaller than a grain of rice can block flow.
Temperature & Environment Factors
Your Manitowoc ice maker not working might simply be too hot or cold. Verify these readings:
– Room air: Must stay above 35°F (check near machine). Below this, water lines freeze internally.
– Ambient heat: Keep kitchen air below 110°F—every 10°F above 90°F reduces output by 25%.
– Incoming water: Ideal range is 48-50°F. Warmer water extends freeze cycles; colder risks component stress.
Harvest Cycle Failures
Ice Stuck to Evaporator
When cubes won’t drop, inspect the evaporator plate with a flashlight. Healthy metal should gleam bright silver—any chalky white coating means scale is preventing release. Also test ice thickness: factory settings create a consistent 1/8-inch bridge. Use a ruler—if sheets are thinner than a dime, ice breaks prematurely; thicker than a nickel, it won’t release. Both scenarios stall production.
Quick Thickness Adjustment
Precisely calibrate your ice thickness probe:
1. Locate the brass adjustment screw on the probe arm
2. Turn clockwise in 1/3-turn increments to thicken ice (1/3 turn = 1/16 inch)
3. Turn counter-clockwise to thin ice
4. Wait 15-20 minutes for a full test cycle before readjusting
Warning: Never force the probe arm—it must swing freely. A sticky probe reads constant contact, tricking the machine into perpetual freeze mode.
Leak Detection & Repair
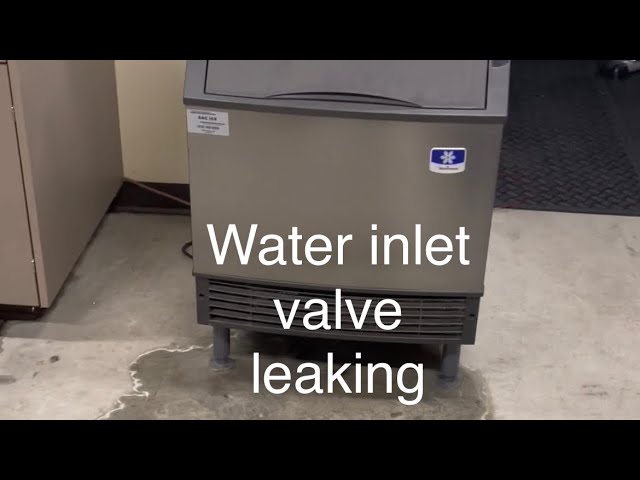
External Water Sources
Water pooling under your machine requires immediate action:
– Power OFF and unplug before investigation
– Trace copper supply lines for wet spots (common at compression fittings)
– Test the floor drain by pouring 1 gallon of water down it—if it backs up, call a plumber
– Inspect the plastic water curtain for cracks; replace if warped
Internal Component Leaks
These demand professional attention but you can identify them:
– Water pump leaks: Loud grinding noises plus water near the machine’s base
– Inlet valve failures: Constant dripping during freeze cycles
– Cracked tubing: Water pooling inside electrical compartments
Critical Red Flag: Any moisture near wiring or the control board—unplug immediately and call service. This risks electrical fire.
Preventing Future Failures
Monthly Maintenance Checklist
Avoid 90% of Manitowoc ice maker not working emergencies with these 10-minute tasks:
– Vacuum condenser fins to remove dust buildup
– Verify 6-inch clearance around all sides for proper airflow
– Inspect water curtain for free movement and seal integrity
– Check for moisture under the machine weekly
Professional Service Schedule
Mark these non-negotiable dates:
– Every 6 months: Deep clean with nickel-safe descaler
– Every 12 months: Technician performs refrigerant pressure tests and sensor calibration
– After 2,000 operating hours: Compressor amp draw analysis
Emergency Reset Procedure
Clear electronic glitches with this factory reset:
1. Hold power button until unit shuts off
2. Wait 15 minutes for complete ice melt
3. Unplug for exactly 10 seconds (less won’t reset memory)
4. Plug back in and power ON
5. Solid blue light confirms success
Note: This only fixes temporary control board errors—not mechanical failures like compressor issues.
When to Stop DIY Efforts
Your troubleshooting ends here when you see:
– Solid red wrench (indicates compressor or evaporator failure)
– Safe mode alerts lasting over 72 hours
– Refrigerant leaks (oil stains near copper lines)
– Internal electrical damage (burnt smells, charred components)
– TXV valve failures (requires vacuum pumps and gauges)
These require EPA-certified technicians. Continuing risks voiding warranties and causing $1,500+ in collateral damage.
Key Takeaway: Most Manitowoc ice maker not working scenarios stem from power oversights, water blockages, or scale buildup—fixable in under an hour with basic tools. Start with the red wrench light and water flow checks before progressing to adjustments. Remember: never force components, always unplug before leak inspections, and schedule professional service annually. By following this guide, you’ll keep ice flowing reliably and avoid 90% of service calls. For persistent issues, consult Manitowoc’s certified technician locator—your machine’s warranty depends on using authorized repair partners.