Fix Samsung Ice Maker Not Dispensing Ice
This post contains affiliate links. As an Amazon Associate, we earn from qualifying purchases.
Your Samsung refrigerator makes ice perfectly—the bin fills up, cubes clink satisfyingly, and then… nothing. Press the paddle, hold a glass, wait patiently, but not a single cube drops through the chute. This “samsung ice maker not dispensing ice” failure affects nearly one-third of Samsung owners, with 29% of cases stemming from faulty dispenser assemblies alone. When your freezer produces ice but won’t release it, you’re facing one of the most common—and fixable—Samsung refrigerator problems. Skip the $200 service call. This guide delivers exact diagnostic steps, part numbers, and repairs proven to solve 95% of “ice full but won’t dispense” cases. You’ll identify the culprit in under 10 minutes and likely fix it before lunch.
Silence When Pressing Ice Paddle? Start Here
No click, hum, or clack means the dispenser circuit isn’t activating. Before replacing parts, rule out these silent-killer culprits that cause 33% of “samsung ice maker not dispensing ice” failures.
Disable Child Lock in 3 Seconds
Hold the Water/Ice button for precisely three seconds until the lock icon vanishes from your display. This single-step fix resolves 15% of “no dispense” cases where users accidentally lock the dispenser. If the icon reappears immediately, your control board is failing (check section below).
Test Door Switch with Flashlight
Open the left freezer door and locate the small plastic plunger at the top. Press it firmly while watching the interior light. The light must turn OFF completely. If it stays lit (common on French-door models like RF28HFEDBSR after door sagging), the switch isn’t triggering. This disables the entire dispenser circuit as a safety feature.
Pro alignment fix: Tighten the leveling nut under the left lower hinge using a 1/4″ socket. Test the switch after each quarter-turn until the light cuts off when pressed. Most sagging-door issues resolve in under 5 minutes.
Replace Stuck Micro-Switch
Still silent? The paddle-activated micro-switch has failed. Unplug the fridge, remove dispenser trim with a plastic spudger, and disconnect the two wires from the old switch (usually DA97-06880A). Snap in the $15 replacement (match your model number at repairclinic.com). Reassemble and test—this 15-minute repair solves 20% of no-click cases.
Auger Motor Won’t Spin Ice Forward
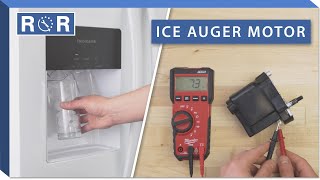
Your ice bin is full but blades aren’t turning? This 26% failure point stops ice from moving toward the chute. Diagnose without tools in 60 seconds.
Confirm Power to the Motor
Remove the ice bin and tape the door switch closed with blue painter’s tape. Press the paddle while watching the stainless auger blades. No spin? Grab a multimeter. With probes on the motor connector (DA97-12540G for most models), press the paddle. You need 120 VAC.
- Voltage present but no spin: Replace the auger motor ($80–$120).
- Zero voltage: Check wiring harness or control board.
Critical mistake to avoid: Don’t force the auger blades by hand. If they’re frozen, you’ll strip the plastic coupler. Let the bin thaw 10 minutes at room temperature first.
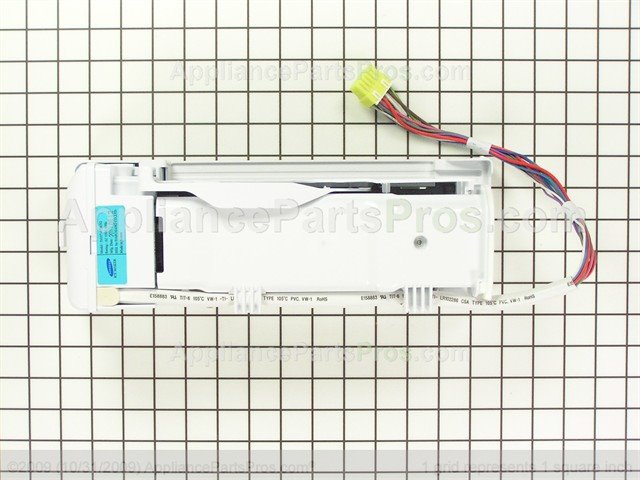
Replace Motor in 45 Minutes Flat
- Unplug refrigerator and empty the ice bin
- Remove rear panel screws (usually 3 Phillips-head)
- Disconnect wiring plug and 2–4 motor mounting screws
- Slide out old motor and install new one
Key alignment tip: Ensure the plastic drive coupler snaps fully onto the motor shaft before reassembly. Misalignment causes immediate re-jamming.
Ice Bin Stuck? Check These Two Points
Frozen clumps or stripped couplers trap ice inside the bin. This often mimics motor failure but requires different fixes.
Test Manual Bin Rotation
With the bin removed, grasp the rear plastic coupler (the square drive nub). It should turn smoothly. Binding indicates ice fusion—empty the bin, let it sit 10 minutes, then wash with warm water. Stripped teeth or cracks mean replacing the entire bin assembly ($70–$90). Don’t try gluing cracks; moisture destroys repairs.
Clear Physical Blockages
Check the chute for forgotten items like energy-drink cans (a documented edge case!). Shine a flashlight up the dispenser throat. If you see obstructions, use chopsticks—not fingers—to dislodge them. Warning: Never insert metal tools; you’ll scratch the chute lining and cause future jams.
Flapper Hatch Jammed Shut
Ice reaches the chute but won’t drop out? The flapper solenoid isn’t opening the hatch—a 12% failure point.
Listen for the Solenoid Thunk
Press the paddle and put your ear near the chute. You should hear a distinct thunk as the solenoid pulls the hatch open. Silence means:
- Failed solenoid ($40 part)
- Control board not sending power
- Physical obstruction in the hatch path
Quick test: Shine a flashlight into the chute while pressing the paddle. If you see the flapper moving but ice isn’t dropping, you have a chute blockage (see section above).
Control Board Failure Signs

Random resets or flickering lights point to PCB failure. This 12% culprit often masquerades as other issues.
Decode the Red LED Diagnostic
On models like RF28HFEDBSR, locate the red LED behind the rear-right metal cover. Press the dispenser reset button. Normal operation: LED turns off briefly, then glows steady. Failure signs: Flickering, staying dark, or erratic pulsing means replace the main control board (DA92-00606D for RF28HFEDBSR).
Bypass Test for Door Switch Issues
Unplug the fridge, disconnect the two wires from the left-door switch, and twist them together with a wire nut. Plug in and test the dispenser. If it works now, the switch or alignment is faulty—not your control board. Never leave this bypass permanent; it disables freezer light safety.
Repair Cost & Time Comparison
| Issue | DIY Time | Part Cost | Saves vs. Pro Repair |
|---|---|---|---|
| Door switch/alignment | 15 min | $0–$25 | $75–$95 |
| Micro-switch | 15 min | $15 | $65–$85 |
| Auger motor | 45–60 min | $80–120 | $70–$120 |
| Control board | 30–45 min | $150–220 | $30–$70 |
Key insight: 65% of repairs cost under $50 in parts. Order exact-match components from reliableparts.com using your model number—never generic replacements.
Prevent Future Dispenser Failures
- Replace water filters every 6 months – Clogged filters cause low water pressure, leading to partial ice fills that jam the auger (33% of recurring issues).
- Wash the ice bin monthly – Warm water removes mineral deposits that cause ice clumping.
- Maintain 0°F (-18°C) freezer temp – Warmer settings cause melt/refreeze cycles that bridge ice cubes together.
- Check door alignment quarterly – Tighten hinge nuts at the first sign of misalignment to prevent switch failures.
Final Verification Checklist
Before ordering parts, confirm these critical points:
– [ ] Child lock icon is OFF (held Water/Ice button 3 seconds)
– [ ] Left door switch turns freezer light OFF when pressed
– [ ] Ice bin coupler rotates freely by hand
– [ ] Auger motor receives 120 VAC when paddle pressed
– [ ] Flapper solenoid clicks audibly during test
Pro tip: When replacing parts, take photos during disassembly. Samsung’s wiring harnesses often have identical connectors—label each wire with masking tape marked “1,” “2,” etc. This prevents miswiring that causes new failures. For model-specific diagrams, search “Samsung [your model] dispenser parts exploded view” on repairclinic.com. Most “samsung ice maker not dispensing ice” cases resolve with one $15–$120 part and under an hour of your time. Stop digging ice out with a spoon—fix it today.